Utilizing Initial Keyframe
info
This section uses the MainLevel map of the RealityExamples template, compatible with Reality Engine version 4.27. It is the default project that comes with a fresh installation. After launching the Reality Editor, you can create the same project through the Virtual Studio template. For more details, visit Reality Examples Project
To utilize the Initial Keyframe:
- Launch the MainLevel map of the RealityExamples template
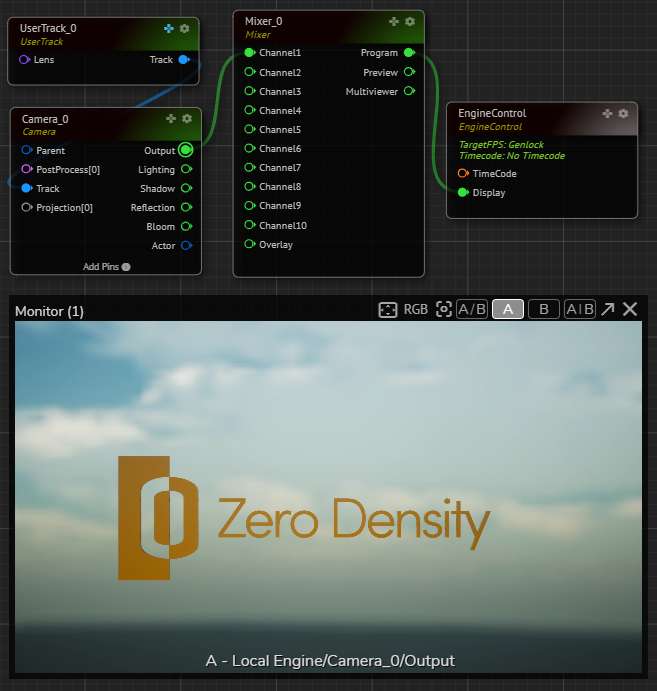
- Create the node tree as shown above and activate the APM

- Select the
UserTracknode, expand itsInputproperty group, and change theUserTransformproperty values as shown above

- Create a new Action, add the
UserTracknode to the Action Timeline - Right-click on the Property Circle of
UserTransform, select the Add Keyframe - Scrub Playhead to second 2, add another keyframe
- Select the first keyframe, and change the keyframe type to Initial, as demonstrated in the above image
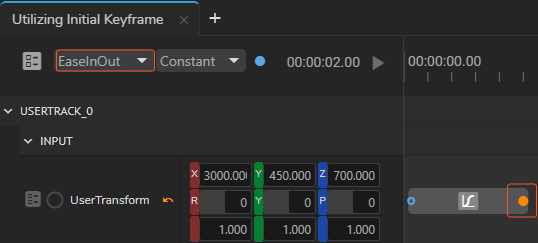
- Select the second keyframe, change its interpolation to EaseInOut
Playing animation in this state will not render anything.
To see the effect:
- Select the UserTransform node, activate the GamePad button
- Hover your mouse over the GamePad, change the Camera view
- Click on the
Playbutton
Now, pressing the Action Timeline Play button takes your camera's latest position and animates it with EaseInOut interpolation within 2 seconds of your Initial Keyframe's location.